|
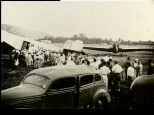
AWM P02107.004 | Salamaua, New Guinea, December 1941: A crowd at the Salamaua airfield watches as European women and children board a tri-motor Junkers 31 aircraft for evacuation to Australia following the Japanese attack on the American fleet at Pearl Harbour, Hawaii. The final evacuation of the remaining European population of Salamaua took place on 23 January shortly after the Japanese invasion of Rabaul, New Britain. |
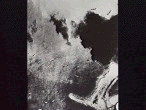
AWM 128121 | Truk, Federated States of Micronesia, 9 January 1942: A specially fitted Hudson Bomber Mark IV, 6 Squadron RAAF, flown by Flight Lieutenant R. Yeowart and his crew reveals the concentration of Japanese shipping at Truk preparing for the invasion of New Britain and New Ireland which took place 12 days later. This reconnaissance flight of 1,405 miles was the longest undertaken to that time by the RAAF in a land-based aircraft. |
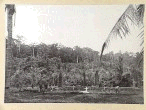
AWM 094652 | Tol Plantation area, New Britain, 1 August 1945: Soldiers of “Lark” Force, the Australian garrison of Rabaul, who were massacred by the Japanese at Tol were buried in this cemetery. After the successful Japanese invasion of Rabaul, New Britain, on 23 January 1942 elements of the Australian garrison escaped along the north and south coasts of the island. In early March about 200 Australian surrendered to the Japanese near Tol Plantation. Of these 150 were killed. |
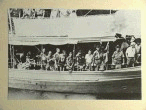
AWM O69372 | Port Moresby, Papua, 12 April 1942: Members of “Lark” Force and other civilians from New Britain crowding the rails of the HMS Laurabada as the ship docks. These men escaped along the coast after the Japanese invasion of Rabaul, New Britain, on 24 January and were evacuated from Palmalal on the south coast two and a half months later. Altogether about 400 Australians escaped from New Britain while about 800 members of Australia’s Rabaul garrison – Lark Force – became prisoners of war. Most of them later drowned after the ship taking them to Japan – the Montevideo Maru – was torpedoed by an American submarine off the Philippines. |
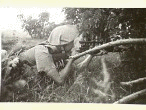
AWM 013827 | Timor Island, 12 December 1942: An Australian sniper, most likely a member of either the 2/2nd or 2/4th Independent Companies, AIF. Timor fell to the Japanese on 23 February 1942 after overcoming its Australian garrison known as “Sparrow” Force. However the 2/2nd Independent Company, later reinforced by the 2/4th, fought on in a guerilla campaign until both companies were withdrawn in late 1942 and early 1943. |
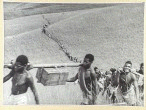
AWM 127956 | Wau, New Guinea, April 1942: Papua New Guinean carriers after many days march approach Wau, New Guinea. Both Allied and Japanese forces throughout the campaigns in Papua and New Guinea relied on local carriers to keep their front-line troops supplied. |
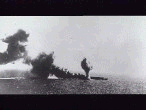
AWM 157892 | Coral Sea, 7 May 1942: The Japanese aircraft carrier Shoho under attack during the battle of the Coral Sea by carrier borne aircraft of the United States Navy. The Shoho sank at approximately 11.36 a.m. |
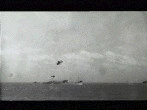
AWM 306610/01 | Coral Sea, 7 May 1942: A Japanese bomber flies near the cruiser HMAS Australia during an attack on Allied warships during the battle of the Coral Sea. The Allied naval squadron, under the command of Admiral Crace in HMAS Australia, by its presence in the area off the east Papuan coast and its withstanding of Japanese air attack, turned back a Japanese invasion fleet from Rabaul heading for Port Moresby. |
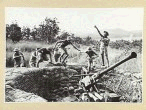
AWM 025622 | Port Moresby, Papua, July 1942: An Australian anti-aircraft gun crew runs into position as the spotter gives the alarm that Japanese planes are approaching. By 21 July 1942 Japanese fighters and bombers, operating from bases in New Guinea and Rabaul, had mounted more than 70 air attacks on Port Moresby. |
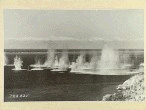
AWM 012968 | Port Moresby, Papua, 24 July 1942: Japanese bombs burst along the waterfront of Port Moresby during an air raid. |
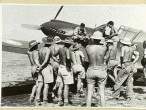
AWM 026050 | Port Moresby, Papua, 27 July 1942: Seen on the wing of his Curtis P 40 Kittyhawk, Sergeant Pilot R. A. Gray, RAAF, who fought the Japanese in Malaya, talks with Australian and American servicemen at a airfield near Port Moresby. Sergeant Gray was with 75 Squadron Kittyhawks. This squadron conducted the air defence of Port Moresby between 21 March and 3 May 1942. During that time they destroyed an estimated 34 Japanese aircraft for the loss of 12 pilots, including the Squadron Commander, Squadron Leader J. F. Jackson. |
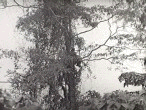
AWM 127962 | Nuk Nuk, near Salamaua, New Guinea, August 1942: Japanese movements in the Salamaua area being observed from an Australian observation post manned by members of the New Guinea Volunteer Rifles. |
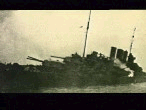
AWM P00698.002 | Off Savo Island, Guadalcanal, Solomon Islands, 9 August 1942: The cruiser HMAS Canberra sinking after the battle of Savo Island. Canberra was part of an Allied naval force defending the American landings on Guadalcanal Island on 7 August from Japanese naval counter-attack. The ship was hit and disabled by 24 shells. On 9 August 1942 the Canberra was abandoned and sunk by torpedo at approximately 8 a.m. |
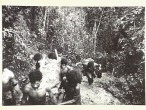
AWM 013286 | Eora Creek, Kokoda Track, Papua, 30 August 1942: Papuan bearers carry a wounded Australian up a steep hill along the Kokoda Track in the Owen Stanley Range. At this stage a Japanese force under Major General Tomitaro Horii was pressing strongly on Australian units south of Isurava and the Australian wounded were being evacuated as speedily as possible along the rough mountain tracks. The Papuan carriers had a particular reputation with the Australians for the care they gave wounded men, a reputation which earned them the title of “The Fuzzy Wuzzy Angels.” During the Kokoda campaign in August, September and October 1942 both the Australian and Japanese forces relied on Papua New Guinean carrier lines for supplies and evacuation of wounded. |
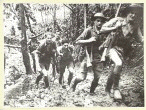
AWM 013288 | South of Isurava, Kokoda Track, Owen Stanley Range, Papua, early September 1942: Soldiers of the 39th Australian Infantry Battalion withdrawing along the Kokoda Track after the battle of Isurava. At Isurava between 27 and 29 August 1942 strong resistance by the 39th Battalion and the 2/14th Battalion, AIF, held up the Japanese advance across the mountains towards Port Moresby. |
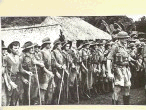
AWM 013289 | Menari, Papua, 22 September 1942: Members of the 39th Battalion parade after weeks of hard jungle fighting on the Kokoda Track. The 39th and Papuan soldiers of the Papuan Infantry Battalion were the first Australian infantry units in July 1942 to confront the Japanese soldiers of Major General Horii’s South Seas Force advancing towards the village of Kokoda from their landing places at Gona on the north Papuan coast. |
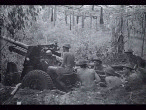
AWM 026739 | Near Ower’s Corner, Papua, September 1942: A gun crew of the 14th Field Regiment, Royal Australian Artillery, fire their 25-pounder gun at Japanese positions on Ioribaiwa Ridge. The Japanese reached Ioribaiwa on the Port Moresby side of the Owen Stanley Range on 11 September 1942 from which they could see the lights of the town. They advanced no further. When Australian units attacked Ioribaiwa on 28 September they found that the Japanese had abandoned their positions and begun to retreat back over the Kokoda Track. |
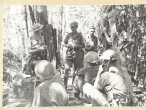
AWM 027010 | Somewhere along the Kokoda Track, Owen Stanley Range, Papua, September 1942: Colonel A. G. Cameron, commanding officer, 3rd Australian Infantry Battalion, briefs a patrol about to move forward against Japanese units retreating over the Kokoda Track. It was this patrol that captured one of the first Japanese prisoners taken during the Kokoda campaign. |
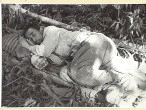
AWM 027076 | Kokoda Track, Owen Stanley Range, Papua, October 1942: Japanese prisoner captured by the 3rd Australian Infantry Battalion between Menari and Efogi on the Kokoda Track during the Australian advance. He may well be one of the first Japanese captured by an Australian unit during the Kokoda campaign. |
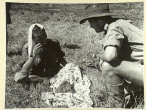
AWM 013615 | Kokoda Village, Papua, 19 November 1942: An Australian officer talks with a Japanese prisoner captured in the Kokoda area. The prisoner is holding a Japanese flag covered in signatures. These flags were given to Japanese soldiers at farewell parties and the signatures were of those who attended such parties. |
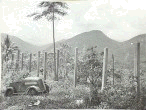
AWM 013609 | Kokoda Village, Papua, 19 November 1942: A row of Japanese grave markers in front of which is a child’s car abandoned when the family fled Kokoda during the Japanese advance of July/August 1942. |
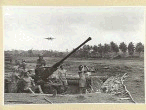
AWM 026629 | Milne Bay, Papua, September 1942: A Kittyhawk fighter of 75 or 76 Squadron RAAF, comes into land at an airstrip as men of the 2/9th Light Anti-Aircraft Battery, Royal Australian Artillery, man a Bofors 40 MM anti-aircraft gun. During the battle of Milne Bay Australian Kittyhawk pilots took off from this airfield to attack Japanese positions on the north shore of Milne Bay. So close were the advancing Japanese at times that the Kittyhawks began firing virtually as soon as they had cleared the tops of the surrounding palm trees. |
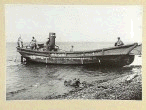
AWM 013325 | Somewhere on the north shore of Milne Bay, Papua, 1 October 1942: Australian soldiers examine one of the disabled landing barges used by Japanese forces during their landings at Milne Bay during the night of 25/26 August 1942. The Japanese landing barges and positions were, from the morning of 26 August, under relentless air attack by Kittyhawks of 75 and 76 Squadrons RAAF operating from airstrips further down the bay. |
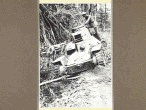
AWM 026631 | Milne Bay, Papua, September 1942: Australian soldiers examine a Japanese light tank used in the Japanese invasion of Milne Bay on the night of 25/26 August 1942. The Japanese advanced along the north shore of the bay to the outskirts of No. 3 airstrip until beaten back by Australian counter-attack. They evacuated Milne Bay on the nights of 4, 5 and 6 September. Approximately 750 Japanese out of a landing force of 2,800 lost their lives at Milne Bay. Australian forces suffered 373 killed and wounded. Milne Bay was the first Japanese defeat on land during the war in the Pacific. |
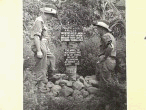
AWM 070384 | Milne Bay, Papua, 12 February 1944: Two Australian soldiers examining a cairn positioned halfway along the north side of the Turnbull Airstrip. The cairn marks the western-most point of the Japanese advance at Milne Bay on the night of 30 August 1942. The notices above the cairn stated that the cairn was a memorial to members of the 7th and 18th Australian Infantry Brigades who gave their lives in the defence of Turnbull Field. In addition they indicated that the cairn marked the grave of 85 unidentified Japanese marines killed in the Japanese attack on the airstrip. |
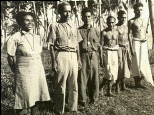
AWM 014649 | Milne Bay, Papua, September 1942: A group of Milne Bay people decorated by the Australian administration of Papua New Guinea for their loyal service during the battle of Milne Bay, 25 August–6 September 1942. The lady on the left is Maiogura, a mission trained nurse, who helped save the life of Leading Aircraftman J. F. Donegan, RAAF. She found him severely wounded, nursed him, and, on one occasion, hid him from the Japanese under a canoe. As a reward she chose a bicycle, a pair of sunglasses, seven yards of material to make ramis, the customary Papuan skirt, and a carton of aspirins. |
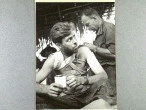
AWM 013814 | Gona, Papua, 11 December 1942: An Australian officer having his wounds dressed. He had just spent eight days lying wounded only yards from Japanese positions at Gona from which he managed finally to crawl undetected to safety. |
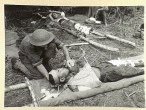
AWM 013880 | Gona, Papua, December 1942: A Japanese soldier receiving treatment shortly after the fall of the Japanese stronghold at Gona on 18 December 1942. The men were wounded in the final Australian assault on Gona on 18 December 1942. Australian forces attacked the strongly defended Japanese positions at Gona between 19 November and 9 December with considerable losses on both sides. The bodies of 638 Japanese defenders were buried at Gona after its fall. |
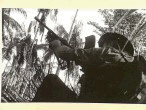
AWM 013952
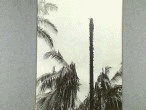
AWM 013965
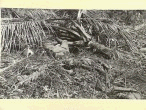
AWM 0139637 | Buna, Papua, 28 December 1942: These three photographs show an Australian Bren gunner firing at a Japanese sniper position in a palm tree, the palm tree after it had been fired upon, and the body of the Japanese sniper at the base of the palm tree. The Bren gunner’s technique was to fire several bursts at a point six feet from the top of the tree, so weakening its trunk. The weight of the sniper then caused the tree to break and he was killed when he hit the ground 60 feet below. |
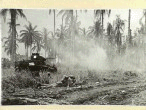
AWM 014007 | Giropa Point, Buna, Papua, 2 January 1942: An Australian General Stuart tank fires on Japanese pillboxes during the final Australian assault on Japanese positions at Buna. The Australians commenced their attacks on Japanese strong points at Buna on 18 December 1942 after earlier unsuccessful American attacks on these same positions. Like previous Australian attacks on Gona the assaults on Buna proved extremely costly for both friend and foe. In just 16 days the Australian 18th Brigade lost 55 officers and 808 men. Of these 22 officers and 284 were killed. Of the Japanese garrison of Buna only 9 were taken alive. |
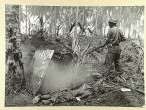
AWM 014082 | Giropa Point, Buna, Papua, 14 January 1942: A dead Japanese soldier lies in front of a wrecked Japanese strong point, or pillbox, at Buna. These strong points, dug out positions covered with coconut logs, were held by their Japanese defenders virtually to the last man. |
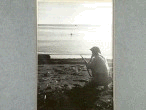
AWM 013966
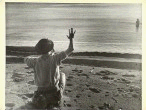
AWM 013967
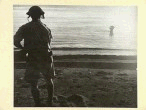
AWM 013968
AWM 013969
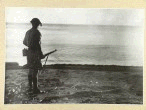
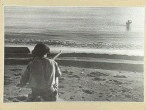
AWM 013970 | Cape Endaiadere, Buna, Papua, no date, but probably during the first few days of January 1943: This series of five photographs depicts the suicide of an escaping Japanese soldier at Buna. When their position was overrun four Japanese rushed into the water. When called on to surrender, three swam out to sea and were shot. The fourth soldier began wading back towards the beach. When ten yards from the shore he opened his hand to reveal a grenade. He tapped the grenade on his head and was immediately blown to pieces. |
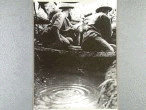
AWM 014211 | Sanananda Track, Papua, January 1943: Australians of the 2/7th Cavalry Regiment in a waterlogged fox hole. They are in a forward position less than 30 yards from enemy positions and the photographer who took this picture could hear the Japanese soldiers talking. |
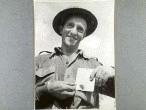
AWM 014226 | Sanananda, Papua, January 1943: Trooper Fred Beale, Brisbane, Queensland, shows the shaving mirror which deflected a Japanese bullet in the fighting near Sanananda and saved his life. |
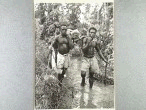
AWM 014249 | Sanananda area, Papua, January 1943: Papuan stretcher bearers carrying a wounded Allied soldier out of the battle area at Sanananda. During the campaign against the Japanese at Buna, Gona and Sanananda on the north Papuan coast between November 1942 and January 1943, the Allies, Australians and Americans, depended greatly on the Papuan carriers for the carrying in of supplies and the carrying out of the wounded from the forward area. |
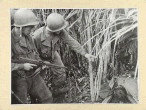
AWM 014235 | Sanananda area, Papua, January 1943: Two American soldiers examining a dead Japanese soldier whom they have just killed. The Japanese soldier had been firing on an Australian ammunition party and when ordered to surrender had refused. |
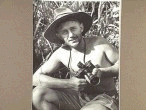
AWM 013757 | Near Gona, Papua, November/December 1942: George Silk, Australian Department of Information photographer. Silk took many of the photographs which featured Australians and Japanese in battle between Kokoda Village and the battlefields of the north Papuan coast at Buna, Gona and Sanananda between November 1942 and January 1943. |
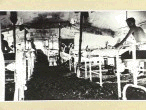
AWM 043253 | Port Moresby, Papua, early 1943: A tented ward of the 2/9th Australian General Hospital. Many of the wounded and dying from the Kokoda campaign and the battles at Buna, Gona and Sanananda between July 1942 and January 1943 were treated in this hospital. It was the closest that nurses of the Australian Army Nursing Service got to the Papuan battlefields. In a special ward of the hospital Australian nurses and doctors attended to Japanese wounded from those same battlefields. It is estimated that in the Papuan campaigns of 1942 and 1943 over 13,000 Japanese were killed or died of illness. In these same operations 2,165 Australians and 671 Americans died. |
|